So, you’ve got an air purifier humming away, doing its thing to keep your home’s air fresh. That’s great! But like any appliance, it needs a little TLC to keep working its best. If you’ve ever wondered about how to clean air purifier components, you’re in the right place. It’s not as complicated as you might think, and a little regular upkeep can make a big difference. Let’s get into the nitty gritty of keeping your air purifier in top shape without a fuss.
Understanding Your Air Purifier’s Filter System
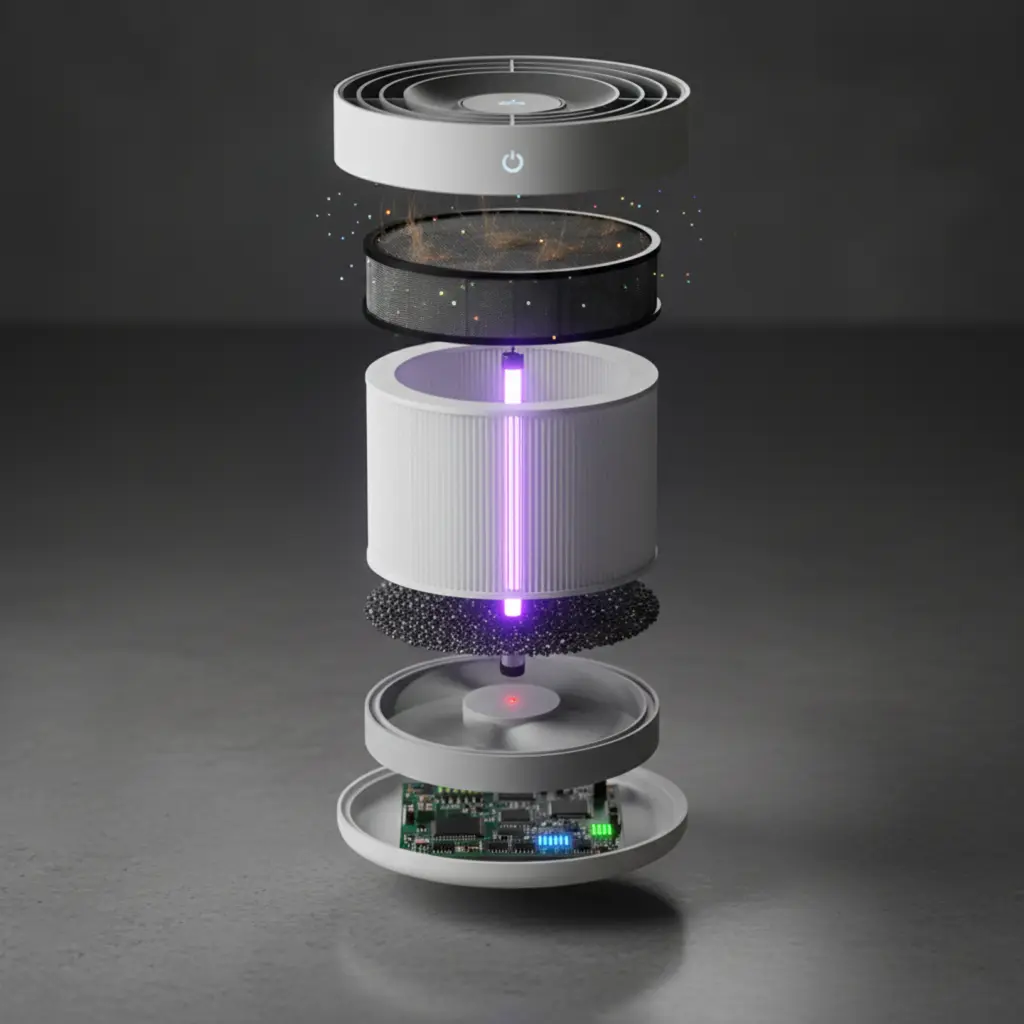
So, you’ve got an air purifier humming away, doing its thing. But do you really know what’s going on inside? It’s not just one magic filter, it’s usually a team effort. Think of it like a multi stage process designed to catch all sorts of gunk floating around your home.
The Role of HEPA Filters
These are the heavy hitters, the ones you hear about most. HEPA stands for High Efficiency Particulate Air. Their main job is to trap tiny particles that other filters might miss. We’re talking about things like dust mites, pollen, pet dander, mold spores and even some bacteria and viruses. To be called a true HEPA filter, it has to capture at least 99.97% of particles that are 0.3 microns in size.
That’s incredibly small! The way they work is pretty neat, they have a dense mat of randomly arranged fibers that create a sort of maze. As air is pushed through, molecules collide with these fibers and get stuck through a combination of mechanisms. Interception, particles follow the airflow but get caught on a fiber, impaction (larger molecules can’t follow the sharp turns in airflow and hit the fibers directly) and diffusion (very small particles move erratically and are more likely to hit a fiber). It’s a physical process, not just absorption.
Activated Carbon Filters Explained
While HEPA filters are excellent for trapping particulate matter, they don’t do much for odors, gases, or volatile organic compounds (VOCs). That’s where activated carbon filters come in. These filters are made from carbon that’s been treated with oxygen to open up millions of tiny pores between the carbon atoms. This process, called activation, dramatically increases the surface area of the carbon.
A single gram of activated carbon can have a surface area of 3,000 square meters (or more!). This vast surface area is perfect for adsorbing odors and chemicals. Think cooking smells, pet odors, smoke, formaldehyde from new furniture, or even fumes from cleaning products. These filters essentially trap gas and odor molecules onto their porous surface through a process called adsorption. However, they have a finite capacity; once all those little pores are filled with adsorbed molecules, the filter can no longer adsorb effectively and needs to be replaced.
Pre Filters: The First Line of Defense
Before the air even gets to the more specialized HEPA and carbon filters, it usually passes through a pre filter. This is your air purifier’s first line of defense, acting as a gatekeeper for larger debris. Its job is to catch the bigger stuff, things like pet hair, larger dust bunnies, lint and visible fibers. Why is this important? Because it prevents these larger molecules from clogging up the more delicate and expensive HEPA and carbon filters. By catching them early, the pre-filter significantly extends the life of the other filters, maintains the efficiency of the entire system, and reduces the frequency of needing to replace the main filters.
Pre filters are often made of a mesh material and are typically washable, making them a cost effective and easy to maintain component. Understanding how each filter type works helps you appreciate why regular maintenance is so important. It’s not just about keeping the machine clean, it’s about ensuring each filter is functioning optimally at its specific task, contributing to overall air quality and device longevity.
How to Clean Air Purifier Components
Alright, let’s get down to actually cleaning your air purifier. It’s not rocket science but you do need to be a little careful, especially with the filters, to ensure you don’t damage them and reduce their effectiveness.
Cleaning Washable Pre Filters
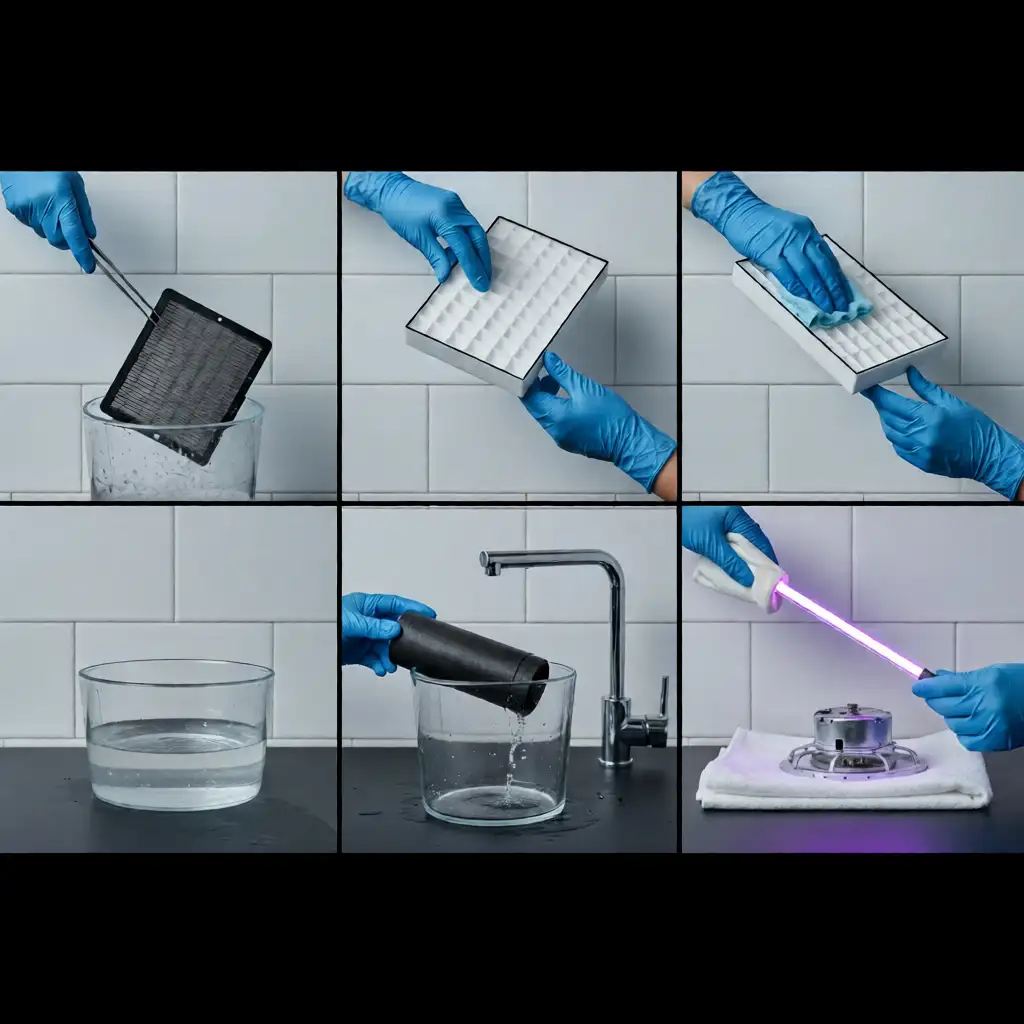
So, the pre filter is usually the first thing that catches the big stuff, think dust bunnies and pet hair. If yours is washable, which many are, this is the easiest part of maintenance. First off, always unplug the unit before you start messing with any components to ensure safety. Then, just gently pull the pre filter out according to your manufacturer’s instructions. Give it a good shake outside to dislodge any loose debris.
After that, a simple rinse under cool or lukewarm running water should do the trick. Do not use any soap, detergents, or harsh cleaners, as they can degrade the filter material over time, potentially causing it to break down or lose its effectiveness. Once it’s rinsed clean, lay it out somewhere to dry completely. It is crucial to ensure it’s bone dry before you put it back in. A damp filter can encourage the growth of mold and mildew, which can then be circulated into your air, defeating the purpose of the purifier.
Vacuuming HEPA and Carbon Filters
Now, for the HEPA and activated carbon filters, it’s a bit different. These are typically not washable. Trying to wash them can ruin their delicate structure, compress the fibers, and make them ineffective at trapping fine molecules. Instead, you’ll want to use your vacuum cleaner. Get the soft brush attachment, the one you typically use for upholstery or delicate surfaces. Gently go over the surface of the filter, sucking up the accumulated dust and particles.
You’re not trying to scrub or apply pressure, just a light, even pass to remove the surface gunk. Do this every month or so, depending on your home environment and how quickly dust accumulates. If you live in a particularly dusty area, have pets that shed a lot, or notice reduced airflow sooner, you might need to do it more often. The goal is to keep the filter media as clear as possible to maintain good airflow and capture efficiency.
Wiping Down Exterior Surfaces and Vents
Don’t forget the outside of the machine! It’s easy to overlook, but dust settles everywhere, and a dirty exterior can mean more dust gets pulled into the system. Grab a slightly damp cloth not soaking wet, just enough to pick up dust and wipe down the casing. Pay special attention to the intake and output vents and grilles where dust can really build up. For these areas, you can use a dry microfiber cloth, a soft brush, or even a vacuum cleaner with a crevice tool to get into the nooks and crannies. A quick wipe down every week or two will keep your purifier looking good and prevent dust from accumulating and potentially being drawn into the internal components. It’s a simple step, but it contributes to the overall efficiency and longevity of the unit.
Ensuring Optimal Air Purifier Performance

So, you’ve got your air purifier humming along, doing its thing to make your home’s air cleaner. Are you really tapping into everything it can do? Installing it and then ignoring it is only step one. A few smart moves in terms of placement, usage, and understanding its features can really make a difference in how well it works, how quickly it cleans your air, and how long its components last.
Proper Air Purifier Placement for Maximum Airflow
Where you position your air purifier actually matters a lot for its effectiveness. Think about it, if it’s tucked away in a corner behind a couch or blocked by curtains, it can’t effectively draw in air from the room or circulate purified air back out. You want to place it in a spot where air can flow freely around it on all sides. A good rule of thumb is to keep it at least one to two feet away from walls, furniture, and other obstructions.
Also, try to position it in the room where you spend the most time, or in areas where you notice the air tends to get stuffy, stale, or carry odors the quickest. Placing it in a relatively central location within the room allows for better air circulation and more efficient cleaning of the entire space. Avoid placing it directly next to heating or cooling vents, as this can disrupt airflow patterns, or in damp, humid areas like bathrooms, as this can affect performance and potentially lead to mold growth on filters.
Adjusting Settings Based on Real Time Air Quality
Many modern air purifiers come equipped with multiple fan speeds or specialized modes. Running your purifier on the highest setting all the time might seem like the most effective way to ensure clean air but it’s not always necessary or efficient. If the air quality in your home is generally good, a lower setting will still do a decent job of filtering the air, while being significantly quieter and consuming less energy.
Some advanced models feature auto modes that utilize built in sensors to detect changes in air quality (like increased particulate matter or VOCs) and automatically adjust the fan speed accordingly. If your model doesn’t have an auto mode, simply pay attention to your environment. If you’ve been cooking, if there’s a lot of dust kicked up from cleaning, or if you notice strong odors, you might want to manually increase the fan speed for a period to tackle the issue more aggressively. Once the air quality improves, you can dial it back down to a quieter, more energy efficient setting.
Leveraging Air Quality Sensors for Smart Operation
Speaking of sensors, if your air purifier is equipped with them, they are incredibly handy tools for optimizing performance. These sensors are designed to detect various types of airborne pollutants, such as fine dust particles (PM2.5), pollen, pet dander and sometimes even gases or VOCs. When a sensor detects a significant increase in these pollutants, it can automatically signal the purifier to ramp up its fan speed and filtration efforts to address the problem. This intelligent automation means you don’t have to constantly monitor the air quality yourself or manually adjust settings.
It’s like having a smart assistant that knows when to work harder. To ensure these sensors function accurately, it’s important to keep them clean. Typically, this involves gently wiping the sensor lens or area with a dry, lint free cloth periodically, as dust accumulation can impair their sensitivity and lead to inaccurate readings. Making small, informed adjustments to where you place your purifier and how you operate its settings based on your environment can lead to noticeably cleaner air, improved energy efficiency, and help your filters last longer. It’s about working smarter, not just harder, with your device.
Knowing When to Replace Air Purifier Filters
Even with diligent cleaning routines, air purifier filters have a finite lifespan. They perform the crucial task of trapping pollutants, allergens, and odors from your air, and eventually, they become saturated or clogged. Knowing the signs that indicate it’s time to replace your filters is key to maintaining your air purifier’s effectiveness and ensuring you continue to breathe clean air.
Signs Your HEPA Filter Needs Replacement
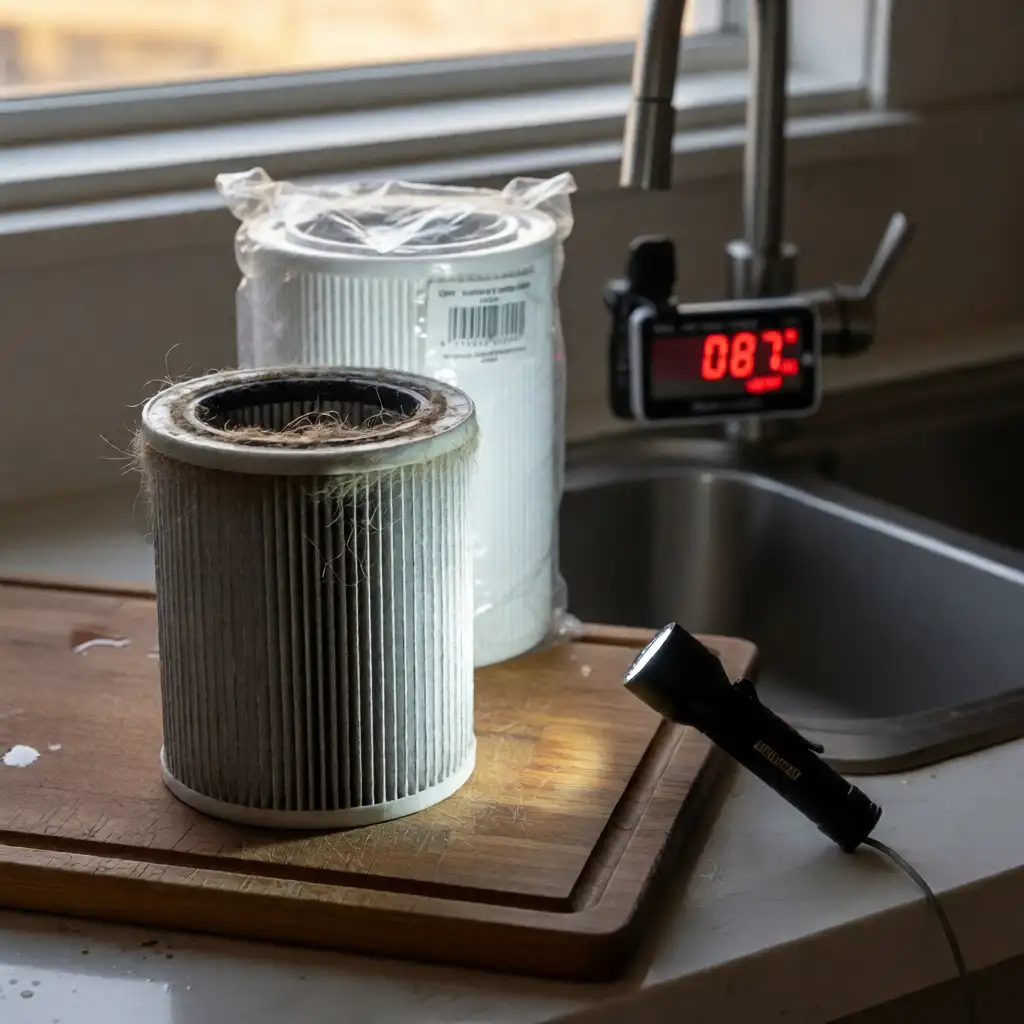
So, how do you know your HEPA filter is past its prime and needs replacing? Keep an eye out for several key indicators. A noticeable decrease in the volume of air being expelled from the unit is a significant clue. If it feels like your purifier is struggling to push air out, or the airflow seems much weaker than before, the HEPA filter is likely clogged with trapped particles. You might also be able to visually inspect the filter (if your model allows easy access) and see a thick, dark layer of dust and grime built up on its surface.
Even if it appears relatively clean, you might notice a decline in air quality, perhaps your allergies are acting up more frequently, sneezing or congestion is increasing or stale odors that the purifier used to eliminate are starting to linger in the room. These symptoms can indicate that the filter’s capacity is exhausted and it’s no longer effectively trapping pollutants.
When Activated Carbon Filters Lose Effectiveness
Activated carbon filters excel at removing odors, gases, and VOCs from the air. However, just like the HEPA filter, their capacity is limited. The primary sign that an activated carbon filter is losing effectiveness is the return of unwanted odors into your living space. That faint smell of cooking, pet odors, smoke or mustiness that your purifier previously managed might start to become noticeable again. This happens because the carbon material becomes saturated with adsorbed odor and gas molecules over time.
Once all the available adsorption sites on the carbon are occupied, it can no longer effectively capture new pollutants. Unlike HEPA filters, which primarily show reduced airflow when clogged, carbon filters often give little visual warning. Their effectiveness diminishes gradually as they adsorb more contaminants. Therefore, replacement is often based on recommended usage intervals (e.g., every 6-12 months) or when odor removal performance clearly declines.
Manufacturer Recommendations and Filter Life Indicators
The most reliable guidance for filter replacement typically comes from the air purifier’s manufacturer. Your user manual will usually specify the recommended lifespan for each type of filter (HEPA, carbon, pre filter) under normal operating conditions. This is often expressed in hours of use or intervals (e.g., replace HEPA filter every 12 months, carbon filter every 6 months). Many modern air purifiers also feature built in filter life indicators. These can be simple countdown timers or more sophisticated sensors that estimate filter life based on actual usage hours and sometimes even air quality data.
When the indicator light illuminates or a notification appears on the display, it’s a clear signal that it’s time to replace the filter(s). Adhering to these recommendations ensures that your purifier operates with optimal efficiency and continues to provide clean air. Replacing filters on schedule is non negotiable for maintaining peak performance. Neglecting this crucial step means your air purifier might be running, but it’s not effectively cleaning your air, potentially leading to a decline in indoor air quality and increased allergy or respiratory symptoms.
Maintaining Your Air Purifier for Longevity

So, you’ve got this air purifier humming along, making your home feel a bit fresher. That’s great! But like anything, if you don’t give it a little TLC now and then, it’s not going to last as long or work as well as it could. Think of it like your car, you wouldn’t just drive it forever without an oil change, right? Your air purifier needs a similar kind of attention to keep it running smoothly and efficiently for years to come.
Establish and Follow a Regular Cleaning Schedule
This is probably the most important proactive step you can take. Sticking to a routine cleaning schedule helps prevent dust, debris, and other contaminants from building up on the unit’s components and filters. It’s not just about aesthetics, a clean machine operates more efficiently, requires less energy and its parts, especially the filters, will last longer. You don’t need to dedicate hours to it, either. A few simple tasks performed regularly can make a significant difference in the overall performance and lifespan of your air purifier.
Here’s a practical way to structure your maintenance:
| Frequency | Task |
|---|---|
| Weekly | Give the exterior casing and visible grilles a quick wipe-down with a slightly damp microfiber cloth. This removes surface dust before it can accumulate or be drawn into the unit. |
| Monthly | Use your vacuum cleaner’s soft brush attachment to gently clean the air intake and output grilles. If your manual allows, gently vacuum the surface of the pre-filter if heavily soiled. |
| Quarterly (or as per manual) | If safe per manual, perform a thorough dusting of interior components, being careful not to disturb sensitive parts like the fan motor or sensors. Always unplug the unit before internal cleaning. |
Proactively Checking for Filter Damage
When you’re performing your regular cleaning tasks, especially when accessing the filters, take a moment to thoroughly inspect them for any signs of damage. Even if a filter isn’t yet due for replacement based on time or usage, it could sustain damage. Look for tears, holes, or punctures in the HEPA filter media, or cracks, warping or damage to the filter frame or seals. If you spot any physical damage, it’s generally best to replace that filter immediately, even if it’s before its scheduled replacement time.
A damaged filter cannot effectively trap pollutants and in some cases, it might even allow unfiltered air or larger particles to bypass the filtration system, compromising the air quality your purifier is meant to provide. Damaged filters are like a sieve with holes, they simply cannot hold onto the particles they are designed to capture such as pollen. This means your air purifier might be running, but it’s working much harder for significantly less result, and you could be inadvertently breathing in pollutants you’re trying to avoid.
Proper Storage of Replacement Filters
It’s common to purchase replacement filters in advance or to have a spare filter on hand. Proper storage of these filters is crucial to ensure they remain effective until they are needed. Always store new filters in a clean, dry environment, away from direct sunlight, extreme temperatures, and excessive humidity. Ideally, keep them in their original, sealed packaging or a tightly sealed plastic bag. This prevents dust, moisture, or odors from contaminating the filter media before it’s even installed. Taking these precautions helps ensure that your replacement filters are in pristine condition and ready to perform at their best when the time comes for installation.
Keep It Clean, Keep It Simple
So, there you have it. Keeping your air purifier running optimally doesn’t have to be a daunting task or an expensive endeavor. We’ve covered how simple, consistent actions like regular cleaning, proper placement and mindful usage can make a significant difference in the effectiveness and longevity of your device. Remember, a little consistent effort goes a long way in ensuring you’re breathing the cleanest, freshest air possible in your home. Don’t overcomplicate it; just establish a routine that works for you, and your air purifier will reward you by performing better for longer. It’s truly about making sure your home environment remains a healthier sanctuary for everyone.
Frequently Asked Questions
It’s a good practice to clean your air purifier’s pre-filter about once a cycle. However, if you notice a significant accumulation of dust, pet hair, or other debris on it sooner, clean it more frequently. This regular cleaning helps the pre-filter effectively trap larger particles before they can clog the main HEPA and carbon filters, thus extending their lifespan.
Generally, no, you cannot wash HEPA filters. They are typically constructed from delicate, pleated paper-like material that can be easily damaged by water. Washing can cause the fibers to clump together and compromise its ability to capture microscopic particles. Instead, HEPA filters should be gently vacuumed with a soft brush attachment. Always consult your specific air purifier’s manual for definitive instructions.
If you neglect regular cleaning, filters can become clogged with dust and debris. This reduces airflow, makes the purifier work harder, consume more energy, and become less effective. In severe cases, clogged filters can release trapped dust back into the air. Dust buildup on internal components can also strain the motor and lead to premature failure.
Indicators include decreased airflow, odors returning, or worsening allergy symptoms. If your purifier has a filter replacement indicator, follow it. Visual inspection may reveal heavy discoloration or buildup. As a guideline, HEPA filters last 6–12 months and carbon filters 3–6 months, but usage and air quality vary.
Place it in an open area with free air circulation, at least one to two feet away from walls or furniture. A central location in the most-used room is ideal. Avoid heating/cooling vents and excessively humid or dusty environments.
Avoid harsh sprays, solvents, or abrasive cleaners. For washable parts like pre-filters, use lukewarm water. For exterior casing and grilles, a damp cloth is sufficient. For sensors, use a dry, lint-free cloth. Always check your manual for approved cleaning instructions.